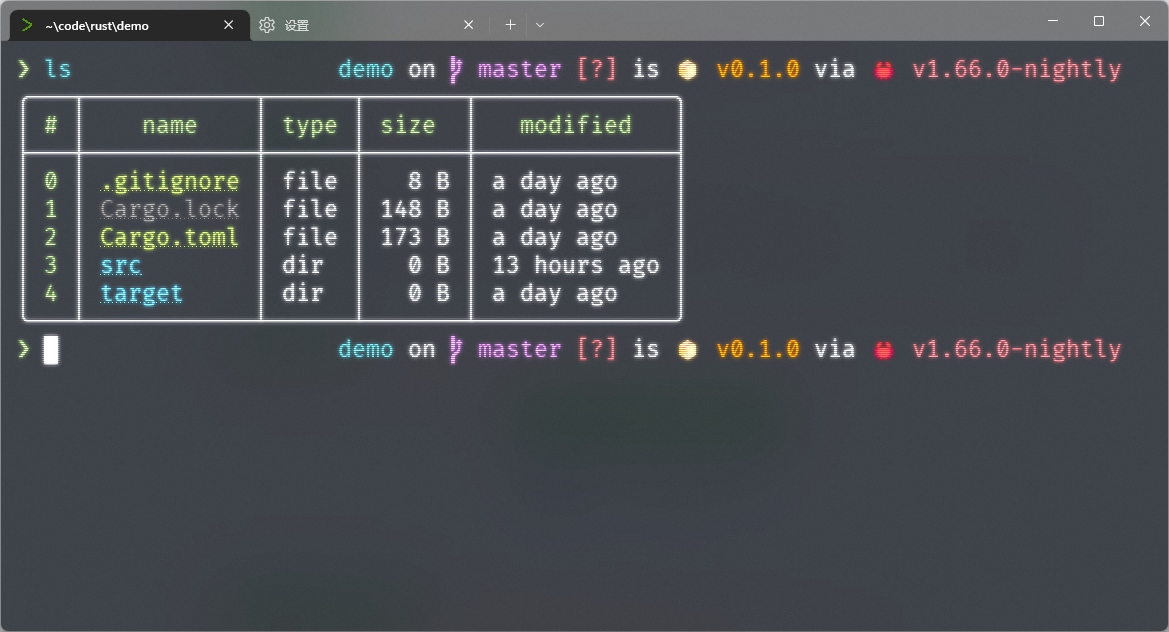
效果展示
教程特点
- 将介绍部分软件官方未支持功能的解决方案, 但大多数都是近期内可能会加入主分支的功能, 将会持续更新。
- 本教程为稍有终端使用基础的用户编写, 如果有部分知识无法理解请在下方评论, 我会更新教程
环境介绍
| 类别 | 值 |
|---|---|
| 系统 | Windows 11 专业版 |
| 版本 | 22H2 |
基础软件安装
推荐使用 scoop 安装
| 软件 | 当前版本 | 功能 |
|---|---|---|
Nushell | 0.70.0 | shell |
fnm | 1.31.1 | node 版本管理 |
| Windows 终端 | 1.15.2875.0 | terminal |
| FiraCode-NF-Mono 字体 | 2.2.2 | Nerd Font |
| Starship | 1.11.0 | shell 主题 |
neovim | 0.8.0 | 终端编辑器 |
Windows终端中配置 nushell
- 命令行即为 scoop 安装目录中
nu的当前版本可执行文件 - icon可以从官方下载 icon
- 其他自己喜欢配置即可
- 配置字体为
FiraCode NFM
配置 nushell
进入 nu 环境 (直接输入 nu 回车即可), 遇到选择直接默认回车即可
不显示 banner
- 运行
$nu.config-path查看配置文件地址, 或你安装了neovim直接nvim $nu.config-path亦可 - 查找
show_banner并修改为false
使用 starship
此处配置与官方和大部分教程不同, 提前让 nushell 支持 右侧提示
编辑 ~\.config\nu\fnm.nu 文件 将 替换为你starship.exe的位置 替换你懂的意思, 以及不要动它旁边的单引号
let-env STARSHIP_SHELL = "nu"
let-env STARSHIP_SESSION_KEY = (random chars -l 16)
let-env PROMPT_MULTILINE_INDICATOR = (^'替换为你starship.exe的位置' prompt --continuation)

# Does not play well with default character module.
# TODO: Also Use starship vi mode indicators?
let-env PROMPT_INDICATOR = ""

let-env PROMPT_COMMAND = {
    # jobs are not supported
    let width = (term size).columns
    ^'替换为你starship.exe的位置' prompt $"--cmd-duration=($env.CMD_DURATION_MS)" $"--status=($env.LAST_EXIT_CODE)" $"--terminal-width=($width)"
}

# Not well-suited for `starship prompt --right`.
# Built-in right prompt is equivalent to $fill$right_format in the first prompt line.
# Thus does not play well with default `add_newline = True`.
let-env PROMPT_COMMAND_RIGHT = {
    let width = (term size).columns
    ^'替换为你starship.exe的位置' prompt --right $"--cmd-duration=($env.CMD_DURATION_MS)" $"--status=($env.LAST_EXIT_CODE)" $"--terminal-width=($width)"
}
然后在nu 的配置文件中激活 , 在 $nu.config-path 末尾添加 source ~/.cache/starship/init.nu
此时 starship 的 right_format 配置就能使用了
附上我的配置文件, 很简洁, 位置为 ~\.config\starship.toml
| |
使用 fnm
新建 ~\.config\nu\fnm.nu 目前最简洁可用的 nushell 下fnm的初始化
load-env (fnm env --shell bash | lines | str replace 'export ' '' | str replace -a '"' '' | split column = | rename name value | where name != "FNM_ARCH" && name != "PATH" | reduce -f {} {|it, acc| $acc | upsert $it.name $it.value })

# Add dynamic FNM path
let-env Path = ($env.Path | append [
  $env.FNM_MULTISHELL_PATH
])
同样激活 在 $nu.config-path 末尾添加 source ~\.config\nu\fnm.nu
代理脚本
alias nuproxy = (let-env http_proxy = "http://127.0.0.1:7890" ; let-env https_proxy = "http://127.0.0.1:7890")
alias unproxy = (unlet-env http_proxy ; unlet-env https_proxy ; )
alias
alias l = (ls)
alias ll = (ls -al)
alias c = (clear)
alias pwd = ($env.PWD)
def b [file] {bat -p $file}
def n [file] {nvim $file}